TEK NET

The Henderson Amateur Radio Club is pleased to present our Tek Net every Sunday evening, starting at 8pm local time (0300 UTC).

The audio portion of the Tek Net will be found on the Henderson Amateur Radio Club Repeater Network (RF).  The audio may also be accessed via Echolink (W7HEN-R node 740644) and Allstar (node 44045).

The audio will refer to this page, so that the listener can more fully understand the concepts as they are presented.

All are welcome!

“Adding a Digital Message unit to your HF radio”.

One of my favorite aspect of amateur radio is the “Homebrew” or the building part.

Tonight’s project is simple to build (the board is already assembled) and is very inexpensive.

If you have a soldering iron and a multi-meter, your good to go.

There are plenty of commercial made units on the market, but they are in the multi hundred dollar range or more.

Tonight’s project will set you back less than $10 (not counting the enclosure) and will last a long time on a three cell “AA” battery pack.

The heart of this project uses the ISD 1820 recordable voice chip and can be found online by Hiletgo and other sellers.

The power supply can be three “AA” cells in a battery pack.

All the connections are clearly marked, except the speaker connection which is made on the back side to the pin indicated in the photo.

  Feature:
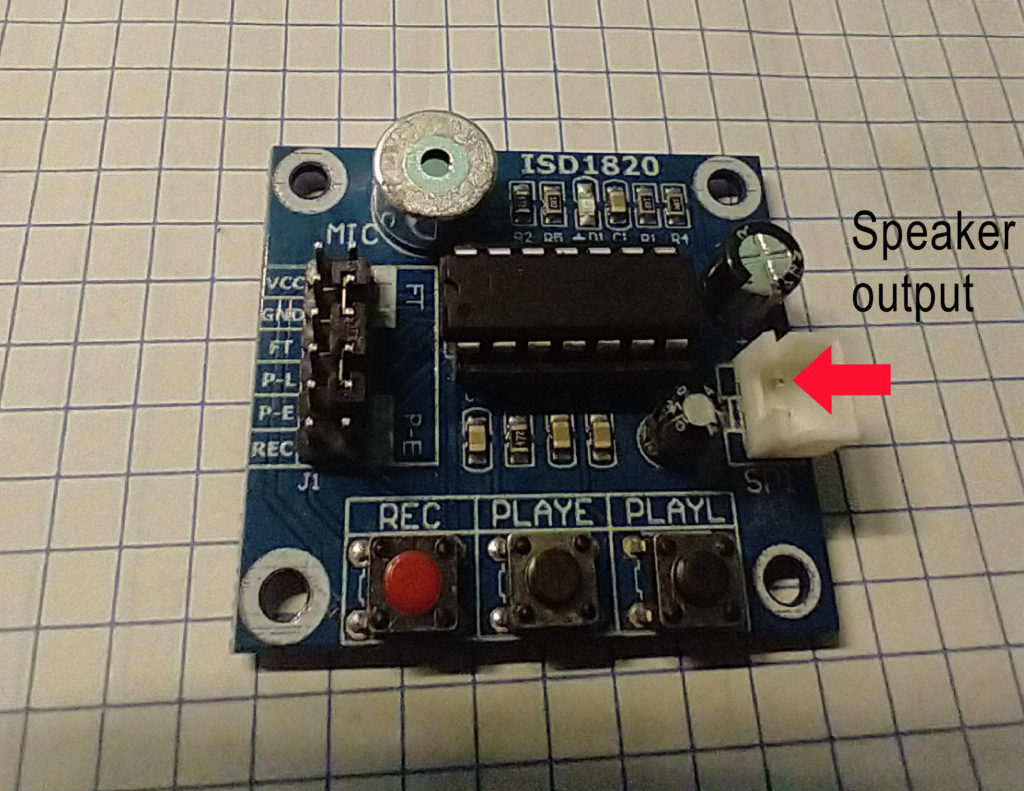
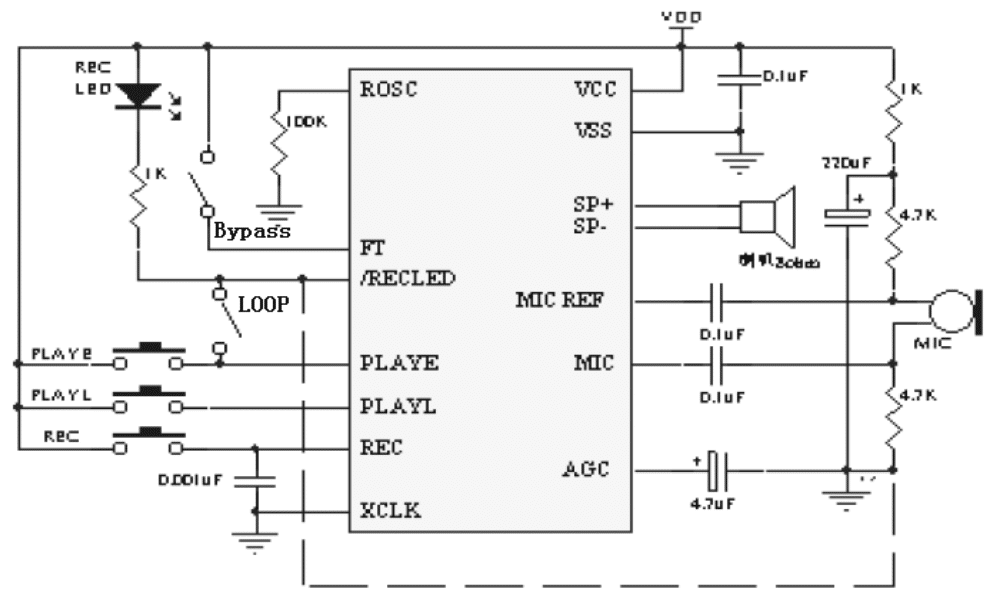
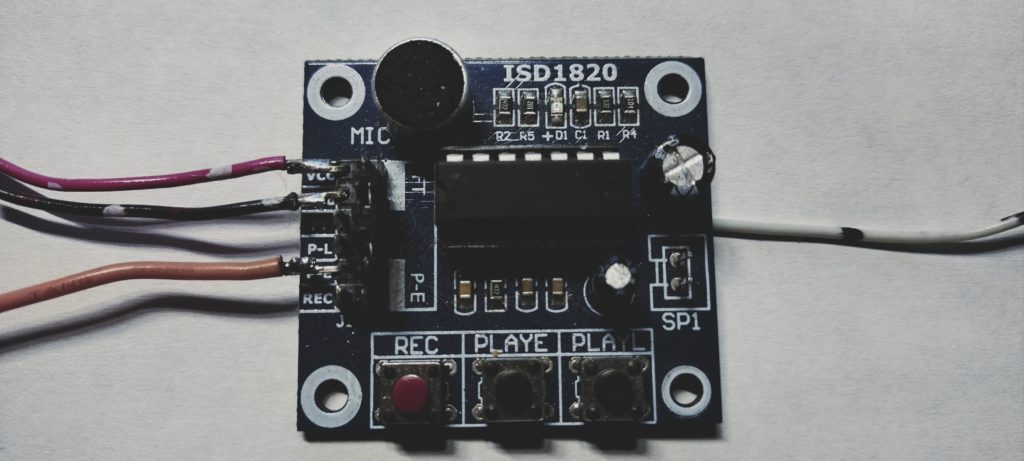
the main chip: ISD1820
size: 38mm * 42.5mm (1-9/16″ x 1-11/16″)
the working voltage: DC 3 ~ 5V
Loudspeaker: 8Ω, 0.5W.

1.An easy to use 10 seconds of voice recording
2.high-quality, natural voice restored
3.can be used as propaganda module
4.with looping, jog playback, single-pass play function
5.available single-chip control
6.this module can directly drive a small speaker 8 ohm 0.5W

Power supply : VCC = 3-5V;
Audio recording control mode: the key to control or microcontroller, IO has drawn the line of control;

Buttons control audio recording method of operation:
REC button: record button, you can press and hold the recording, release the button to stop recording;
RLAYE key: trigger mode playback, press will play this whole speech;
PLAYL key: jog mode playback, press and hold until playback, release to stop playback;
RPL Jumper: loop mode control, loop playback;
FT Jumper: direct control, microphone voice through the speaker can playback;

As you can see there are only four connections to this circuit board, making interfacing to your radio very easy.

The connection to the speaker will provide both the audio output from the ISD1820 but also a small DC voltage, that will drive the 2N2222A transistor providing PTT during the playback. The bottom Orange wire goes to a momentary push button to start the message. Grounding this wire will start the playback.

I would recommend that you plug in the small speaker that comes with this kit and attach the battery and play around with the recording and play back functions.

When you have the message sounding the way you want then unplug the speaker, otherwise it will severely load down the audio line to the transmitter.

The only limit to this project is your own creativity.

You can build several of these in a chassis with individual push buttons and have multi messages available…example for contesting, one for calling CQ, another with your location info, another for the rig & antenna info….you get the picture.

A tip…when recording your message, get up close to the microphone, about 1″ when speaking and have any background noise at a minimum, the microphone is very sensitive.

At a price of $7.95 for two, you can build up a unit with some of the whistles and bells that the high dollar units have.

Until next week….have fun!

73

DE WB6AMT